Laminate wood flooring can be installed as a DIY project, and homeowners can accomplish this task with a few essential tools. Before getting started, the initial step is to ensure the area you’ll be working in is well-prepped and ready to go. Here’s how to do it.
Measure the Room
The first step to a successful installation is to measure the room, so you know how much flooring you’ll need. It’s better to overestimate than underestimate, as you don’t want gaps when the flooring is finished!
Prepare the Subfloor
It’s essential to make sure the subfloor is clean and level before you start the installation. Sweep off dirt or dust, and apply a self-levelling compound if needed. You’ll also need to use an underlayment to the subfloor to provide a cushion for your laminate flooring.
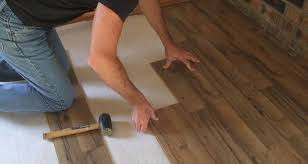
Lay the Flooring
Once you’ve measured and prepped your subfloor, it’s time to start laying the laminate flooring. You should start from the left corner of your room and work your way out. Place the first board and gently lock it into the other boards, ensuring they fit together tightly. Once all the flooring is laid, use a tapping block to ensure the joints are tightly secured. For a range of Laminate Wood Flooring, visit irwintiles.ie/wooden-flooring/laminate-flooring

Finishing Touches
Once the installation is complete, wipe down the floor to remove dust or debris. If the edges and corners of the flooring aren’t sealed, use a laminate floor sealer to finish the job. Enjoy your new laminate wood flooring!

